Photography is a creative way to capture memories, express ideas, and tell stories through images. Whether you use a smartphone, a DSLR, or a mirrorless camera, learning a few essential techniques can help you take better pictures. You do not need expensive equipment or years of experience to start improving your photography skills. Understanding light, choosing the right angle, composing your shots carefully, and practising regularly can make a noticeable difference.
For beginners, the most important step is to learn how different photography techniques affect the final image. Instead of relying entirely on automatic settings or editing filters, start by understanding the basics and experimenting with simple adjustments. These practical photography tips for beginners will help you build confidence, avoid common mistakes, and capture more attractive photographs in everyday situations.
1. Understand Your Camera or Smartphone
Before learning advanced photography techniques, become familiar with the device you use. Explore its camera settings, focusing options, exposure controls, grid lines, and available shooting modes. Understanding these features makes it easier to choose the right settings for different subjects and environments.
If you use a smartphone, learn how to tap on your subject to focus and adjust brightness when the camera allows it. Avoid unnecessary digital zoom because it can reduce image quality on many devices. Instead, move closer to the subject when it is safe and practical.
Camera users can begin with automatic mode and gradually explore aperture priority, shutter priority, and manual mode. You do not have to master every setting immediately. Learning one feature at a time will help you understand how your camera responds to different lighting conditions.
2. Learn to Use Natural Light
Lighting is one of the most important elements of photography. Even an interesting subject can look unappealing when the lighting is too harsh, uneven, or insufficient. Before taking a picture, observe where the light comes from and how it falls on your subject.
Natural light from a nearby window can work well for indoor portraits and product photography. Outdoors, early morning and late afternoon often provide softer light than direct midday sunshine. These periods are commonly associated with the golden hour, when sunlight can create warm colours and gentle shadows.
Avoid placing your subject directly in front of a bright light source unless you intentionally want a silhouette or backlit effect. If the sunlight is too strong, look for open shade or a location with more even lighting. Learning to recognise good light can improve your photographs without requiring additional equipment.
3. Apply the Rule of Thirds
Composition refers to how you arrange elements within a photograph. A well-composed image guides the viewer’s attention towards the main subject and creates a more balanced appearance.
The rule of thirds is a useful starting point. Imagine dividing your image into nine equal sections using two horizontal and two vertical lines. Positioning your main subject along one of these lines or near an intersection can create a balanced and interesting photograph.
For example, when photographing a person outdoors, you can place them slightly to one side and leave some space in the direction they are looking. For landscape photography, positioning the horizon along the upper or lower third can help emphasise either the sky or the foreground.
Remember that the rule of thirds is a guideline, not a strict requirement. Centred compositions and symmetrical arrangements can also be effective when they suit the subject.
4. Keep Your Subject in Sharp Focus
A photograph may have beautiful colours and excellent lighting, but an incorrectly focused subject can make it less effective. Before taking a picture, identify the most important element and make sure it is in focus.
For portraits, focus on the person’s eyes whenever possible. For close-up photographs of flowers, food, or products, focus on the detail you want viewers to notice first. Smartphone users can usually tap the desired area on the screen to set focus.
Movement can also affect sharpness. If your subject is moving, use a faster shutter speed when your camera allows it. When photographing stationary subjects in low light, hold your camera steadily or use a tripod to reduce blur caused by camera movement.
After taking important photographs, review them at a larger size to check focus and sharpness rather than assuming every image is clear.
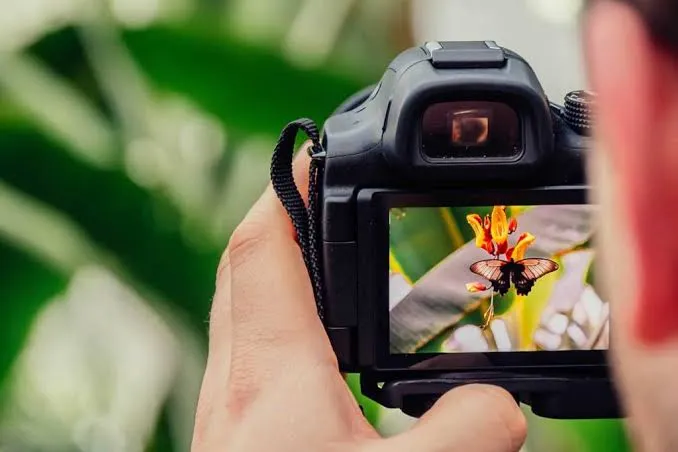
5. Understand Aperture, Shutter Speed, and ISO
Learning the exposure triangle is one of the most valuable photography tips for beginners. Aperture, shutter speed, and ISO work together to influence exposure, while also affecting the appearance of an image.
Aperture
Aperture controls the size of the lens opening. It is measured in f-numbers. A wider aperture, represented by a smaller f-number such as f/2.8, lets in more light and can create a blurred background. This is useful for portraits and close-up subjects.
A narrower aperture, represented by a larger f-number such as f/8, provides greater depth of field, helping more of a scene remain in focus.
Shutter Speed
Shutter speed determines how long the camera sensor receives light during an exposure. A faster shutter speed can freeze movement, making it useful for sports, children, and moving animals. A slower shutter speed can capture motion blur or light trails, but it also increases the risk of camera shake.
ISO
ISO controls the sensor’s light sensitivity setting. A lower ISO generally produces cleaner images, while a higher ISO can help in darker conditions but may introduce visible digital noise.
Start with a low ISO in bright conditions and increase it when necessary. The best settings depend on available light, subject movement, and the effect you want to achieve.
6. Experiment With Different Angles
Taking every photograph from eye level can make your images look repetitive. Changing your shooting position is a simple way to discover more interesting compositions.
Try photographing a subject from above, below, or from the side. For food photography, a top-down angle can show the arrangement of a dish, while a lower angle may emphasise its height and texture. For portraits, shooting near eye level often creates a natural connection with the person.
You can also move around your subject to find a cleaner background or a more attractive direction of light. Before taking the picture, check the entire frame rather than focusing only on the main subject.
Small changes in perspective can completely change how a photograph feels and what it communicates.
7. Keep the Background Simple
A distracting background can compete with the main subject and make a photograph feel cluttered. Look for unnecessary objects, bright spots, messy surroundings, or lines that appear to pass through a person’s head.
You can improve the background by changing your position, moving closer to the subject, or choosing a simpler location. Using a wider aperture, where appropriate, can also help separate the subject from the background.
However, a background does not always need to be plain. Buildings, trees, textures, and other environmental details can add context and tell a story when arranged thoughtfully.
The goal is to make sure every visible element contributes to the photograph rather than distracting from its main purpose.
8. Practise Framing and Leading Lines
Framing and leading lines are two composition techniques that can make photographs more engaging. Framing means using elements such as doorways, windows, tree branches, or arches to surround or highlight your subject.
Leading lines are visual lines that guide the viewer’s eyes through an image. Roads, pathways, fences, bridges, and building edges can lead attention towards a particular point.
For example, when photographing a pathway through a garden, position yourself so that the path leads towards an interesting subject in the distance. When taking an architectural photograph, use the building’s natural lines to create a sense of depth.
Experiment with these techniques, but avoid adding unnecessary elements simply to make a photograph look complicated.
9. Avoid Overediting Your Photographs
Editing can improve exposure, contrast, colour balance, and composition, but excessive adjustments may make pictures look unnatural. Beginners should first aim to capture a well-exposed, well-composed image in the camera.
After taking a photograph, make small adjustments to brightness, highlights, shadows, and white balance where needed. Crop the image to remove distracting edges or improve its composition. Keep skin tones and natural colours looking realistic unless a deliberate creative style is intended.
Save an original copy before making substantial edits. This allows you to return to the original image if you later decide that the changes are too strong.
Good editing should enhance the photograph rather than hide problems that could have been corrected while shooting.
10. Practise Regularly and Review Your Results
Consistent practice is one of the most effective ways to develop photography skills. You do not need to visit a special location or photograph something extraordinary every day. Ordinary subjects such as plants, household objects, street scenes, food, and family moments provide useful opportunities to practise.
Choose one technique at a time. Spend a day experimenting with natural light, then practise the rule of thirds or try photographing moving subjects. Compare the results and identify which changes made the biggest difference.
Review photographs that did not turn out as expected. Check whether the image was too dark, the subject was out of focus, the background was distracting, or the composition could have been improved. Treat mistakes as opportunities to understand your camera and make better decisions next time.
Common Photography Mistakes Beginners Should Avoid
Several common mistakes can prevent beginners from getting the results they want. These include using digital zoom unnecessarily, ignoring the background, taking pictures against harsh light without adjusting the exposure, and moving the camera while using a slow shutter speed.
Another mistake is assuming that expensive equipment automatically produces better photographs. A more advanced camera can offer greater control, but composition, lighting, focus, and timing remain essential.
Avoid applying the same editing style to every picture. Different subjects and lighting conditions may require different adjustments. Most importantly, do not take dozens of photographs without reviewing what you have learned from them.
Conclusion
Learning photography takes time, patience, and experimentation, but beginners can make meaningful progress by focusing on a few essential techniques. Start by understanding your camera, using natural light, composing images carefully, and keeping your subject in focus. Gradually explore aperture, shutter speed, ISO, framing, and basic editing to gain more creative control.
You do not need expensive equipment to take better pictures. What matters most is learning to observe your surroundings, recognise good lighting, and understand how small adjustments affect the final image. Practise regularly, review your results, and experiment with different perspectives. With consistent effort, you can develop your photography skills and capture images that are clearer, more balanced, and more visually appealing.
Read More: marathimeanings.com